Blackadder's Early Scratchbuilt Projects

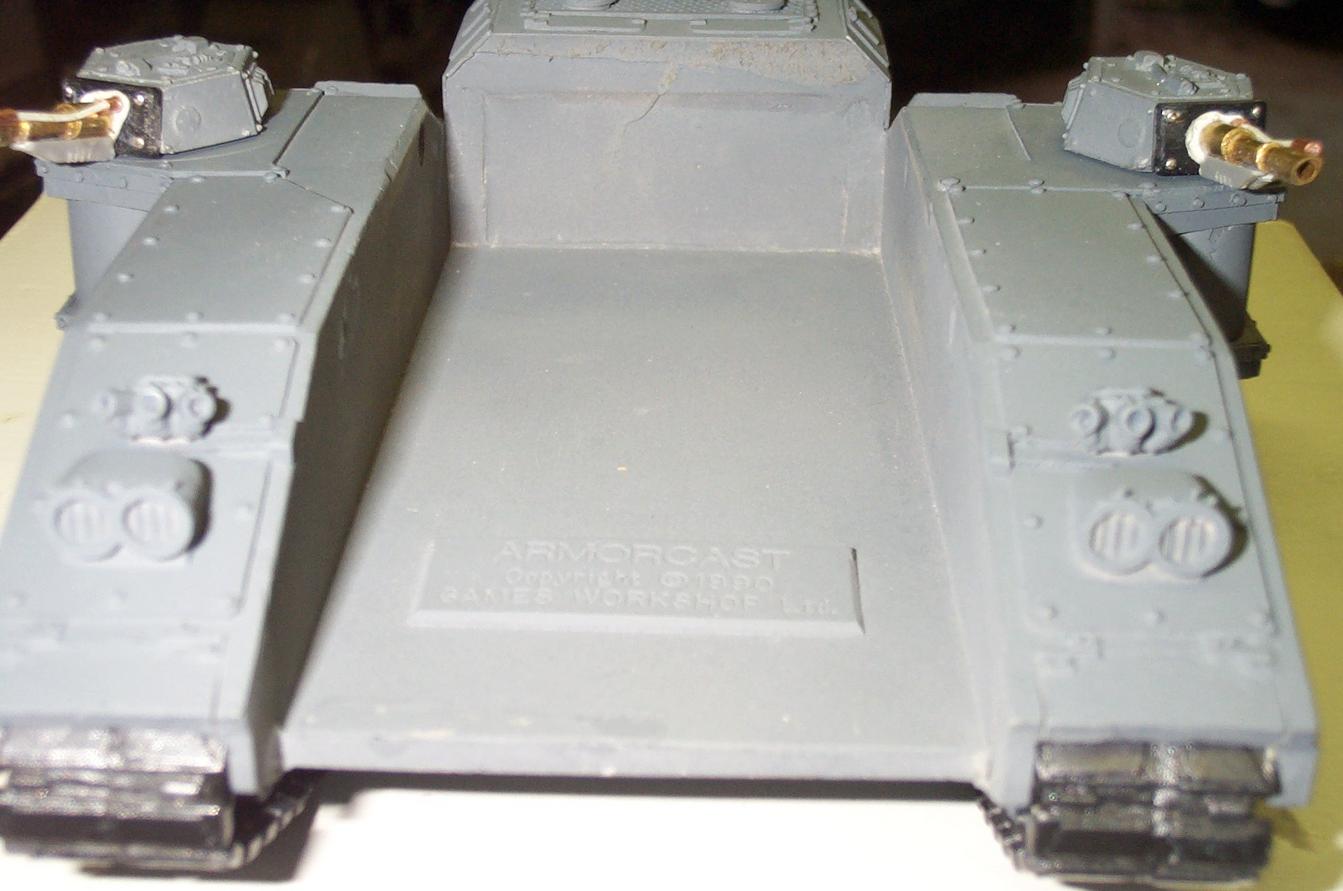
  • Well I did it and I'm glad. Back in the days when my son was just starting out in 40K gaming we bought a tired old Armorcast Baneblade on Ebay and refurbished it. Although he was in ecstasy over it I was always bothered by the rather primitive design and the cranium sized rivets so after I replaced it with a Mars Pattern Baneblade (his favorite not mine) I asked him if I could do a bit of a face-lift on the old relic.


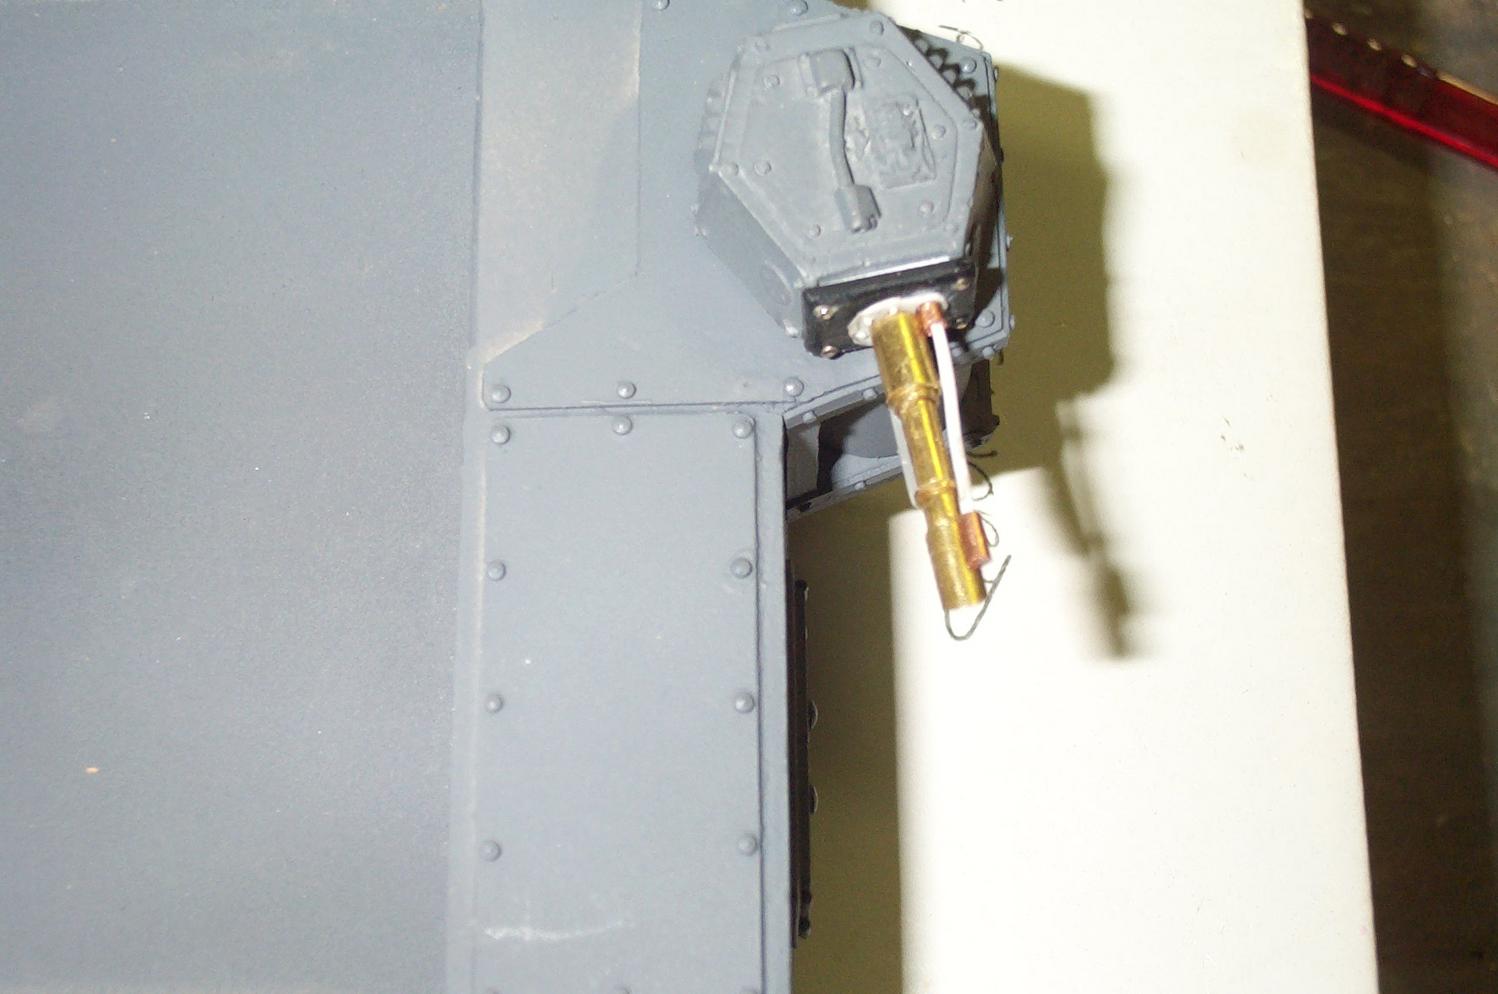
    As usual my documentation is sporadic and there's a lot of pictures of the same thing. My biggest regret is not showing the step by step manufacture of the demolisher cannon which I am especially proud of. Casting new lascannons for the sponsons is missing but the actual barrel manufacture is available so let's get started with a battle board scene of the tank company and the hapless Armorcast Baneblade in her prime.


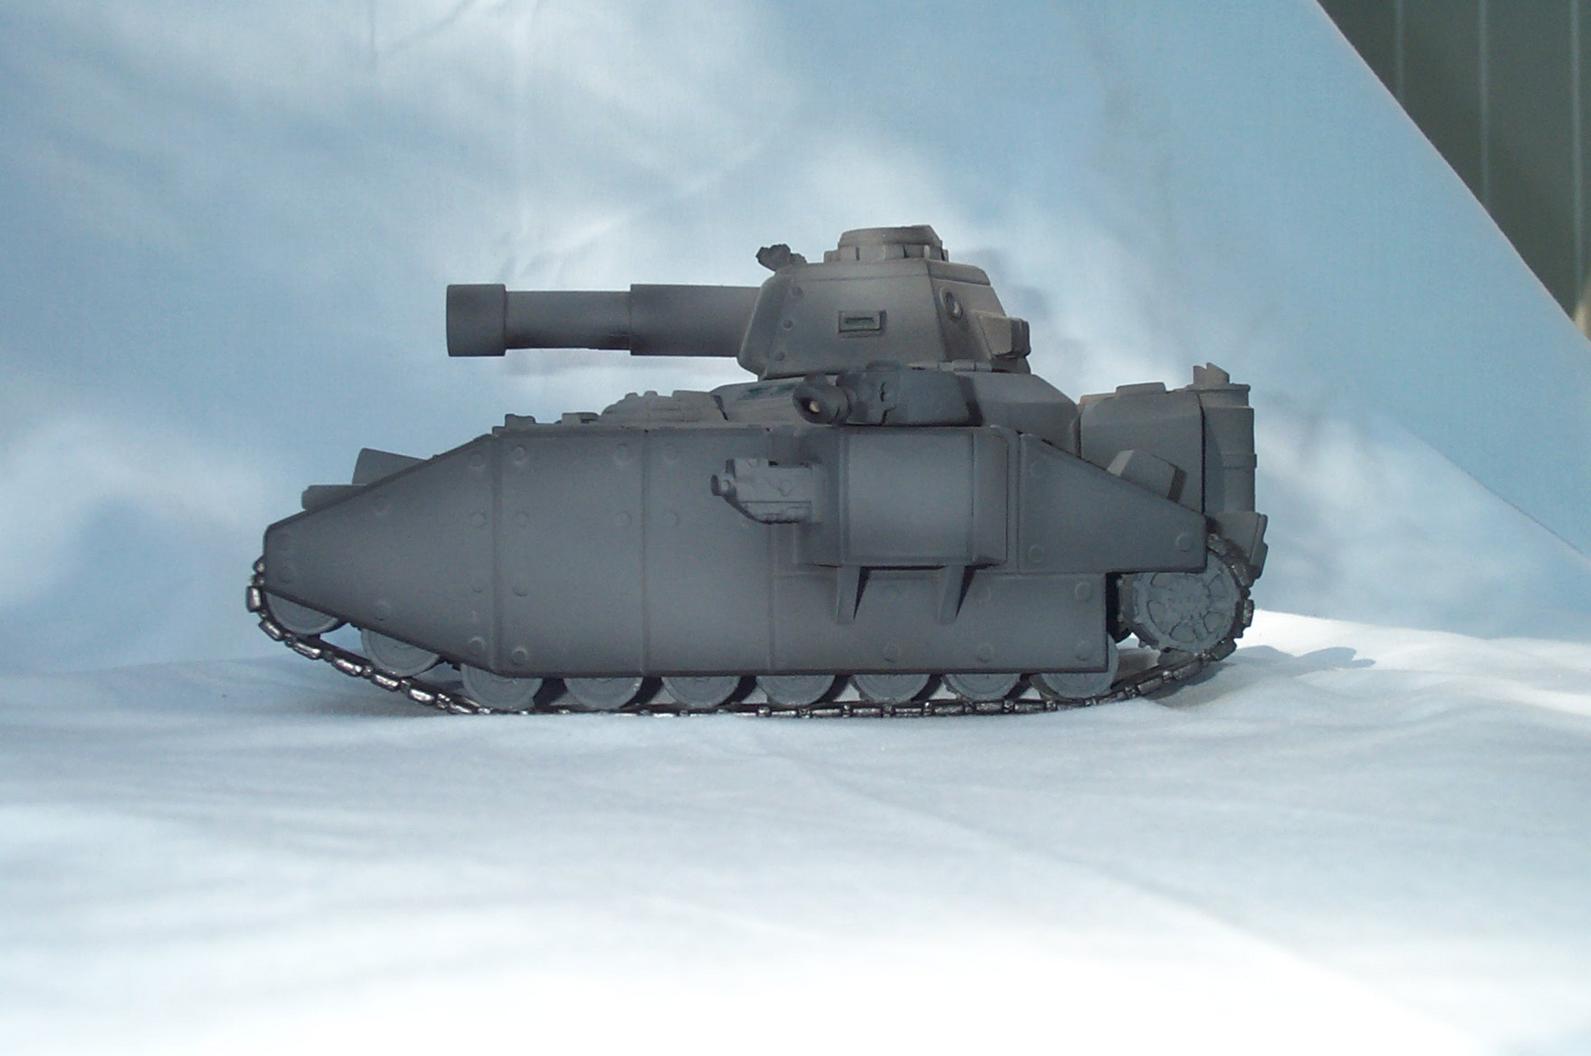
    Here we see the victim in my favorite color scheme, Gray sand-able primer with flat black accents. Not too big on camouflaging Superheavy tanks as the true life dimensions are literally as big as my house so other that disguising it as a boulder there's not much point.


    The Lucius Pattern Baneblade in the foreground is my favorite tank. I picked it up on EBay for next to nothing and it was a pitiful wreck with the treads glued on backwards and globs of glue and paint all over it. After I lovingly scrapped all the paint and glue off I pried apart all the pieces with surprisingly little breakage and reassembled. That project will be documented in another thread.


    "It is easier to deceive people than it is to convince them that they have been deceived."

    3 Mal editiert, zuletzt von Blackadderz ()

  • This was my first attempt at scratch building; I had only just discovered plasticard sometime in the year 2009. If I had started this years ago I might have charted a whole different course in employment. :D


    Can everyone see these pictures or do I have to reload them?

    "It is easier to deceive people than it is to convince them that they have been deceived."

    Einmal editiert, zuletzt von Blackadderz ()

  • Pictures are finde!


    And motive too! xD For the first attempt its great! Had you had plans for that or is it out of mind?

  • I had the Lucius Baneblade in the foreground for reference but what I did to the Armorcast model was strictly off the top of my head. Not having worked with plasticard I had no idea of the possibilities.


    Let me state on the outset that I had been building models for many years and most recently wood plank on frame sailing ship models.


    First order of business is to get rid of the outrageous oversized rivets and cut out the sponsons for a drum mounted pair of bolters. I find a razor saw and sandpaper invaluable in modifying resin models, also the resin does not hold paint very well so scraping with a dull Exacto #11 tip while time consuming will remove all the paint down to the bare resin.


    "It is easier to deceive people than it is to convince them that they have been deceived."

    Einmal editiert, zuletzt von Blackadderz ()

  • I take a rather dim view of the Games Workshop plastic Baneblade considering the bottom has dropped out of the resin Baneblade market. My hard won Forgeworld Baneblades have lost considerable value since the advent of this kit and I'm surprised Forgeworld hasn't protested this copy. LOL


    On the plus side the plastic model does not have the artistic content that the FW resin model had including the fantastically beautifully rendered FW tread design. FW may have given up the rights to produce a Baneblade facsimile but not to the designers creative skills. The resin model is still top drawer IMHO, the plastic model a distant second.


    I'll not be using any parts from the plastic Baneblade kit. Almost every thing will be cast or scratch built including the nuts on the bolt on bumper. Rivets are the easiest of all, I use various sized straight pins. Pins have the added value of anchoring the armor panels where plastic is glued on resin and at the scale we're talking a round head and a hex head bolt are too similar to be concerned about IMHO.


    About the only bits I used are the various hatches and doors and vents mainly from Leman Russ and Chimera kits.


    The chopping continued:


    I feel like Sweeney Todd,


    The Blackadder

    "It is easier to deceive people than it is to convince them that they have been deceived."

  • If I had it to do over again, I probably would not have chopped up the turret as apart from the excellent mount lock design there was very little left of the original turret when I finished.


    Whoops,


    The Blackadder

    "It is easier to deceive people than it is to convince them that they have been deceived."

  • Time to stop my mad careering path of destruction and actually do something constructive.


    Using industrial quality 'Met-all' A-4 epoxy I formed the rear storage compartments on the turret and by laminating sheets of styrene from the slat of a cheap Venetian Blind fabricated the front turret shield.


    The strap hinges are from round stock and blind material.


    The main gun is a gray marker pen and the secondary gun is scratchbuilt out of various sized plastic tubing. styrene blind strips formed the edge gusset strips and decorating pins for Styrofoam ornaments cut to length form the rivets. I'm more than a little irritated that I didn't document the fabrication of the front hull details.


    The forward view port hatch approximated the one that is offered as a bitz from the chimera kit that I didn't know was available.


    I have the dubious knowledge that mine required a couple of hours labor. The headlight housings, armor, hatch with periscope, periscope forward view port splash shield were all hand crafted from styrene. Flare launchers and winged skull are the only bitz in the picture.


    "It is easier to deceive people than it is to convince them that they have been deceived."

  • Amazing work, mate!

    32371-7ce43923.jpg
    "God-Emperor? Calling him a god is what started this mess in the first place..."
    Bjorn the Fell-Handed

    Calculon zu GWs Releasepolitik: Je schneller das Karussel fährt, desto besser kann man Kotzen :D

  • I tried casting lascannons but the detail was too fine so I opted to make them from scratch. The lascannon turrets were cast from the Forgeworld turrets using latex rubber moulds which in themselves are very hard to make. If anyone knows an easy way to make latex moulds, I would appreciate the input.


    I had purchased a bag of mixed brass tubing scraps years ago at a hobby fair and with a razor saw and jewellers files a managed to cobble together a fair looking set of lascannons. The lascannon base was a piece of thin printer case material and the electrical cable the very thinnest styrene rod superglued together and inserted into a very thin brass collar. The cannon barrel and details were all superglued together (no soldering required) drilling an appropriate sized hole into the turret and supergluing the cannon assembly into the turret brought me to the stage pictured below.


    An application of a thin coat of gray primer to reveal the flaws, revealed no flaws. No serious flaws anyway ;)


    Imagine that,


    The Blackadder


    I realize that this overview don't supply any in depth construction techniques and only just a visual aid. I will respond to any request for elaboration on any and all points of construction...........

    "It is easier to deceive people than it is to convince them that they have been deceived."

  • I spoken of drilling and tapping mount holes in various projects. The process is simplicity itself the main problem being centering the drillbit where you want it and making sure you mantain the drill perpendicular to the project so the turret turns true and doesn't wobble when you turn it.


    I use 6-32 or 8-32 machine screws which give a fine enough thread pitch so when the turret is turned it doesn't raise or lower perceptibly. Small attentions to detail like that can make a model and when I find myself thinking that something is good enough, its time to put the model aside for a while and do something else because 'good enough' usually means I'm just getting too lazy to try to do it better.


    I glued a thin 0.5 mm thick fender washer to the bottom of the lascannon turret for a race and threaded the mount area in the tread housing to accept the screw. The turret screws into the housing and as the range of rotation is only 180°the turret only lifts 0.5 mm in it range of turning, not enough to notice.


    The completed turret with washer showing.

    "It is easier to deceive people than it is to convince them that they have been deceived."


  • Note that destroying the Armorcast turret was not necessary. There is virtually nothing left of the original features other than the well designed locking ring.


    My only regret in producing this modification.


    The rivet in the blast shield actually serve a purpose, since the shield was made of slats from a Vientiane blind which was incompatible with plastic glue the pins hold the shield together.


    The rest of the bitz come from a Leman Russ.

    "It is easier to deceive people than it is to convince them that they have been deceived."

  • One major problem I had was the rear projection of the tank which is dictated by the twin exhaust mufflers. These are of a certain height so the rear of the engine compartment must be of a proper reletive size.


    To me the rear looks too big height wise as related to the width but the rest of the overall size is in proportion to the FW model so where the error lies is unknown.


    "It is easier to deceive people than it is to convince them that they have been deceived."

  • Hollowing out the sponsons with a rotary rasp attached to a Dremel


    I first scribed the area to be removed and then using a razor saw cut as deeply into the sponson as possible.


    using a series of drill bits to remove as much material as possible to the required depth then removing what is left with the rotary rasp.


    Finally to square the inner corners I used an Xacto 12 MM chisel blade.


    "It is easier to deceive people than it is to convince them that they have been deceived."

  • To refresh heres the top view of the hull again:


    hat follows is another thing that caused me regret that is I didn't record the scratch building of the demolisher cannon which is surely the crown jewell in this work.


    Every bit if it was hand carved and filed to painstaking exactitude and to prime it and glue it in place without so much as one WIP photo is a shame. But whatever it's done is done can't be helped.


    The aux fuel drums were made of PVC tubing and the fill caps made from the caps of BIC pens.


    "It is easier to deceive people than it is to convince them that they have been deceived."

  • Sorry to say there are no more construction images. After I sprayed on the primer I gave the tank a wash with India ink and left it until I decided on a Legio theme which I am pretty sure will be War Griffons but that is subject to change.


    The final images:


    Next up will be my first total scratch build Super Heavy Tank, I'll keep this under the same Thread title.

    "It is easier to deceive people than it is to convince them that they have been deceived."

  • A few years back I saw this tank on Ebay. A beautiful rendered model by Marcio Silva in some ways superior than dare I say Forgeworlds outstandingly designed super tanks.


    Anyhow I resolved to make one of my own and the following posts will chronicle the step by step result.


    The Blackadder


    NOTE: The following 5 images in this initial post are of M. Silva's original tank.


    The subsequently posted images will be my interpretation of his work. EB


    "It is easier to deceive people than it is to convince them that they have been deceived."

  • Mr Silva appeared to have used foam filled poster board stock which I deemed too flimsy for my model as my son, an avid gamer tended to get a little rough with the equipment. Looking around for a suitable material for the basic hull brought me to the black plastic IBM Styrene printer ribbon cases that my company discards by the hundreds each year. The plastic is thick and durable and compatible with most plastic glue mediums.


    Thus I embarked on this venture and the first evening yielded this result.


    "It is easier to deceive people than it is to convince them that they have been deceived."

  • Mr. Silva's excellent effort and I'm sorry to say the overall concept is in the first post. My own humble copy are in these subsequent posts with a few alterations to the original design. The faceted superstructure which is the design achievement I rendered faithfully and ran into the same problems that Mr. Silva encountered. whereas he left gaps in his edition, I used Metall A4 epoxy to make for a seamless upper quarter panel.


    As you can see I got a little over enthusiastic with this my second scratch built. I spent more than a few hours in producing drawings of that which I had already formulated in my mind.


    Of course it is great in retrospect to have these projections available so anyone so inclined to reproduce the vehicle.


    You won't see this on any of my other constructions I am sorry to relate.

    "It is easier to deceive people than it is to convince them that they have been deceived."

  • As explained on the images if you print this as directed a full 'landscape' template should print out.


    Of course I didn't take into account metric sized printer paper, the images will print out 8 X 11 inch landscape.


    Well when the rest of the world recedes into the dark ages of Imperial measure then all will print right............


    Meanwhile you can get practice on scaling the images on your image processor..............

    "It is easier to deceive people than it is to convince them that they have been deceived."

  • Once I managed to draft a Full scale four projection drawing I knew I just had to finish this project; but already I was having reservations about the main gun. The plasma cannon on the Stormblade had caught my eye. I began making alterations in the plastic hull to accommodate this fearsome weapon. The hull material as you can see is some rather nice RECYCLED printer ribbon cartridge plastic that cuts well with razor saw and utility knife. Testors plastic glue works best, the material does not respond well to Ambroid liquid though.


    The IBM printer cartridges are black styrene about 3,0 mm thick and make for a robust framework for the model..............


    Note the rather rough and ready joints I was satisfied with when I first started out building from scratch.


    I found later on that making my seams tight eliminated a lot of sanding and filling.

    "It is easier to deceive people than it is to convince them that they have been deceived."